Showing posts with label Wall Decor. Show all posts

Friday, April 1, 2011

Alphabet Art

I am working on a piece right now that is inspired by a Pottery Barn typewriter picture.  I am using bright bold colors and it will be perfect for the gender neutral nursery its going into.  Interpretations of the alphabet are really popular right now, from funky wall letters to prints from etsy sellers they are everywhere.  Here are some favorites that I rounded up:

Love this eclectic mix of letters.  Marshalls, TJMaxx and other discount home stores are a great place to look for letters
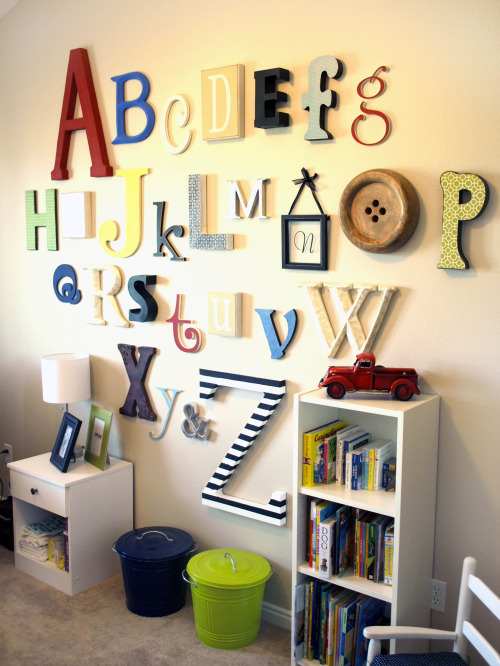
image from Project Nursery

You can also try Hobby Lobby or other craft stores and add your own paint or paper accents
image from here

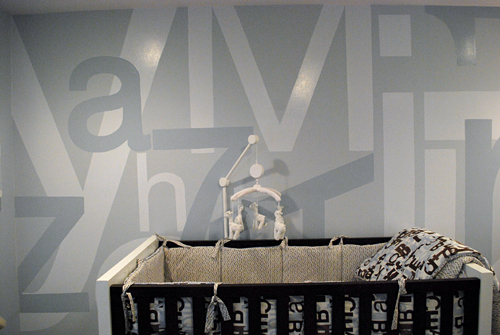
This room has the alphabet painted right on the wall
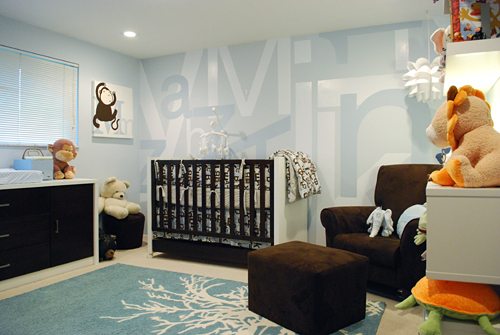

image from Project Nursery

Alphabet flash cards are an easy, inexpensive way to cover a large space
image from here

I'm loving these industrial chic letters from RH Baby.  They are 10" tall and only $14 each.  Not too bad and they have the perfect antique look

Monday, May 11, 2009

You're My Inspiration (Sing it!)

In the spirit of Mother's Day, I thought I would share a little project that my own Mom did recently. Inspired by my post about Grandma's button tin, she decided to create a piece of wall art for her craft room. Yes, I am jealous that she has a craft room. I have the dining room floor. Now, let me explain a little bit about my Mom. She is wonderful and can assist with almost any kind of crafty project I need help with. She is the Mom that made our Halloween costumes and sewed all the curtains in our house. Unlike me (who cuts things out without drawing them first and freehands paintings) she is super precise and measures everything. That said, she isn't the most artsy person, so I was interested to see what she came up with on her first attempt at using a canvas.

Instead of painting, she decided to sort of sew/needlepoint on the canvas. She used regular old yarn and a thick needlepoint needle to do the design. Since canvas is a little thick, she used a scrapbook paper piercing tool to punch a tiny hole in the canvas before threading the needle through. Some of the flowers are made of paper and felt, and those she found at the scrapbook store and just glued on. The red flower is a silk flower from the craft store that she stitched down in the center. And of course, almost every flower has a button accent. She used some buttons from her Grandma's tin and some from a big bag of mixed buttons from Hobby Lobby.

Finished off with some ric-rac and a polka dot ribbon for hanging, it is perfect for her craft room or any little girls room. I think she did a great job and proud of her for getting creative! Just don't ask me to make one for you......I usually pin together my sewing project and have her do it for me.

Saturday, March 7, 2009

Use Fabric to Make a Bold Statement

Looking for something inexpensive that will make a bold statement in any room? Covering canvas with your favorite fabric is easy to do and makes a big impact. These days fabric comes in so many cute patterns and even Wal-Mart carries a great selection. Or, if you want to match your crib bedding and it has cute sheets, you can always purchase a fitted sheet and cut it down to fit. Tip - fitted sheets can also be turned into coordinating window valances if you can sew!

When selecting a canvas size to use, you can choose multiple smaller ones and use a different fabric on each, or one large one to hang on a big, open wall. Or, for those of you more daring and with a crafty husband or dad, it may be cheaper to use wood to create your own frame sizes. You will just need a miter tool to make the corners look right.

Once you have your frame shape, lay the fabric face up and put the canvas on top. Depending on the thickness of your canvas, cut it out with enough to overlap on the back about 2 inches. Make sure if there are lines or a pattern in the fabric that they are straight and in place when you cut. Then, lay the fabric face down and place the canvas on top, also face down. Using a staple gun, gently pull and wrap each section, securing with a staple. Be sure to use the same amount of tension all the way around as you wrap or a pattern could look funny. Tip - stripes are hardest to work with, so you may want to steer away from them. Take extra care with the corners, you may have to trim excess fabric from them.

If you choose a simple fabric, you can embellish it with trim around the edges, or even paint baby's initials right on the canvas.

Its as easy as that! Cheap and it makes a big impact. You can use this in the nursery or any room in the house. A more expensive fabric from a specialty store looks great on a canvas over the fireplace!

Wednesday, March 4, 2009

Grandma's Button Tin

My Grandma on my Dad's side was always an inspiration to me. As a child she would make me milk free (I was allergic) chocolate puddling pies. How that is even possible I have no idea. She could sew anything and painted the most beautiful watercolor pictures that hung around her house. I am lucky enough to have her sewing machine and a picture of ducks she painted that I plan on hanging in the office when I redecorate it. But, my fondest memory of visiting Grandma's was her button tin. Your Grandma probably had one too. A tin that had gathered generations worth of spare buttons. Not the cheap plastic kind we have now, but detailed buttons made of wood, shells or tarnished brass. I would sit for hours and string button necklaces with thick yarn. I could string, take apart and restring for hours.

So, when I ran across this picture on the Pottery Barn Kids website, it brought back memories of my Grandmother. Available in 3 or 4 different shades and a couple of sizes, they are made using different shaped circles with criss cross stitching made to look like buttons. But, how great would it be to create something unique, something personal that is truly yours for your baby. I think Grandma would be honored to know that her buttons have made their way into the baby's room, even if she isn't here to meet them.

I hope this post inspires you to personalize your space with something from your family's past. Because something cherished from generations past means so much more than anything you buy in the store. Even if it needs a bit of freshening up to work in your new space.

Saturday, February 7, 2009

Give Those Wooden Name Letters a Makeover

One of the most popular pieces of wall decor in the nursery these days are wooden letters that spell something, most typically, baby's name. These standard letters are easy to come by, available everywhere from Hobby Lobby to Pottery Barn - for those of you that are only buying name brand for baby. In a variety of fonts and colors, these letters add a touch of personalization to your huge, blank walls. If you purchase unfinished or white letters, they are easy to paint with simple acrylic craft paint. For an added touch, you can use ribbon to hang the letters. A cute alternative to nails, try using drawer pulls (also available super cheap at Hobby Lobby - can you tell I'm a fan?) as hangers for your ribbon. But, as always, I suggest you take it up a notch and jazz those letters up.


This adorable M started off as your standard white letter. Scrapbook paper was used to add some pattern. A great alternative to paint, scrapbook paper comes in a ton of different patterns so you are sure to find one you like that coordinates with your decor. Try choosing a paper that ties into your color scheme, but it doesn't have to match perfectly. As long as the colors are in the same family its ok if the pattern is different. To make this letter, just lay it face down on the paper and trace. Then, carefully cut out your template and apply to the letter using decoupage. You can layer the paper, or do alternate letters in different patterns to add some punch. This sound like too much of a project? I'd be happy to help.


For those of you that aren't quite so crafty, these ready made letters are available at a great store called Anna Bella Kids. At around $20 a letter, they have a huge variety of colors available. Let's just hope Junior has a short name. Kimberly would have run my Mom $160....a little pricey. Love these but low on cash? Try just doing baby's initials.


Thursday, February 5, 2009

Its a wall mural, no, its a chalk board!

I don't know what is is lately, but I have been loving owls. They weren't my sorority animal, I did not go to Rice, so I am not sure why I like them. Not your typical nursery decor animal, they are a little playful, a little stylish and definitely unique. When searching the web for inspiration, I came across this great website, www.moderndose.com. They carry tons of different stylish, affordable modern home decor items for every room in your home, including the nursery or playroom. This cute little website is where I cam accross these wall murals that serve 2 functions. They fill up a blank wall and the best part is, they are also a chalkboard. So, your toddler can color away and create anything they can imagine. Just make sure to explain the different between the mural and the wall in the dining room, where they can't color.
So, these murals got me thinkging. You can buy chalkboard paint at any home improvement store. Typically it is used to paint an entire wall or door in a child's room. But, why not use this paint to create your own mural! Sound like too much of a project? Check out ModernDose for more chalkboard murals in themes other than owls.
